Intro #
This is only for use by advanced users that have their EZABL system installed correctly and understand fully how it works.
This guide is put together for people who asked but we always recommend running a fresh mesh (G29) before starting a print like our installation guide states.
Some people who have very stable and properly build machines can take advantage of a stored mesh to decrease print start times but it is not recommended on most printers.
The information on this page is provided as-is with no support or warranty from TH3D.
Overview #
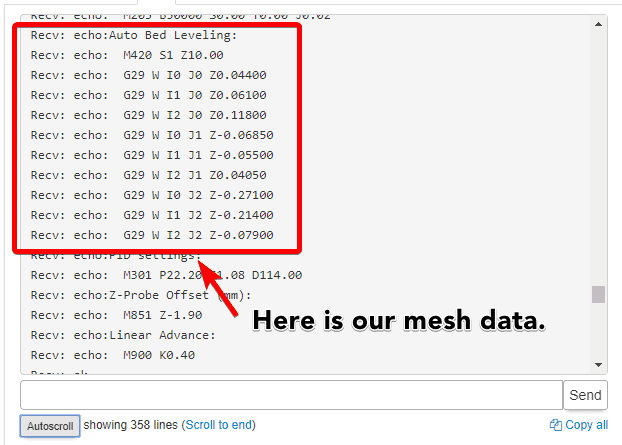
The EZABL and the Unified Firmware support storing your bed leveling mesh. What this means is that you only need to probe the bed initially and then you can store it so all that is needed in your starting code is G28 then M420 S1 to recall the mesh data from EEPROM.
You can store this mesh in the printer EEPROM. This will save print time as you won’t need to probe the bed every print. Read this entire article to get this setup. Do not skip any steps.
NOTE: If you change your bed surface and/or remove the plate you are printing on you may need to get a new mesh. Over time your bed may warp slightly differently or things can shift. If you notice the stored mesh is not working as well anymore then get a new mesh. To do this just repeat the steps below in the “Steps to generate and store the bed leveling mesh” section.
If you have a machine that the gantry always gets out of level this may not work as well as probing a new mesh at the start of every print. Try it out and see if it works for your machine. Every printer is different so your mileage may vary.
Steps to generate and store the mesh #
Pictures are at the end of the article if you want to see how it should look.
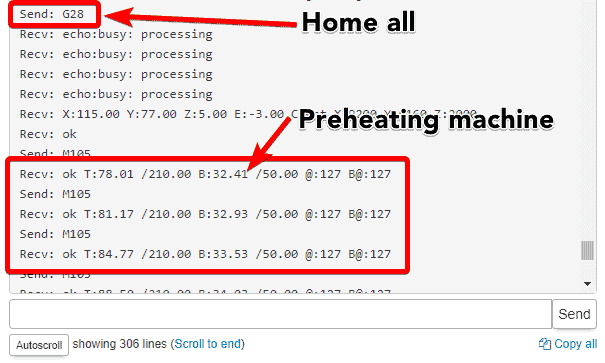
- Send a G28
- Preheat the machine to your normal print temperature
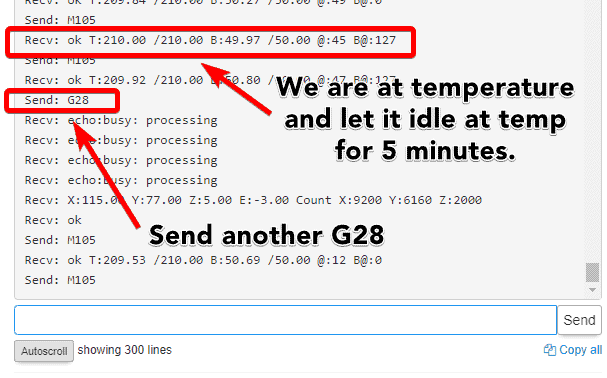
- Let the printer sit at temperature for 5 minutes to let everything expand as it heats
- Send a G28
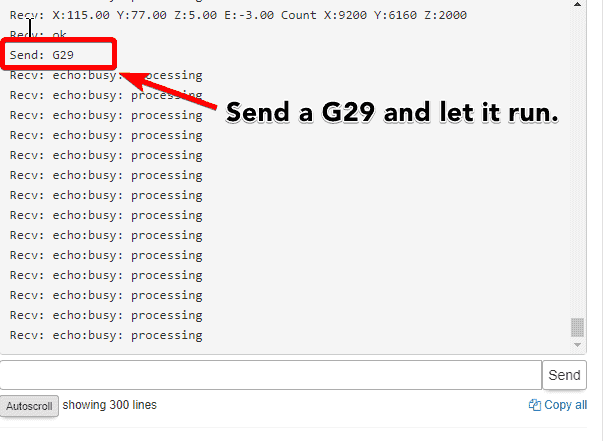
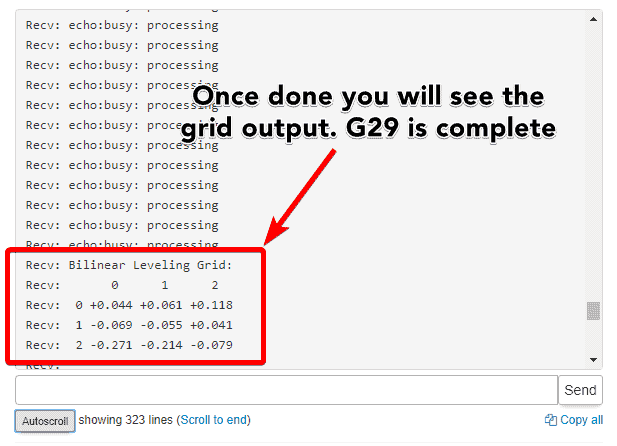
- Send a G29
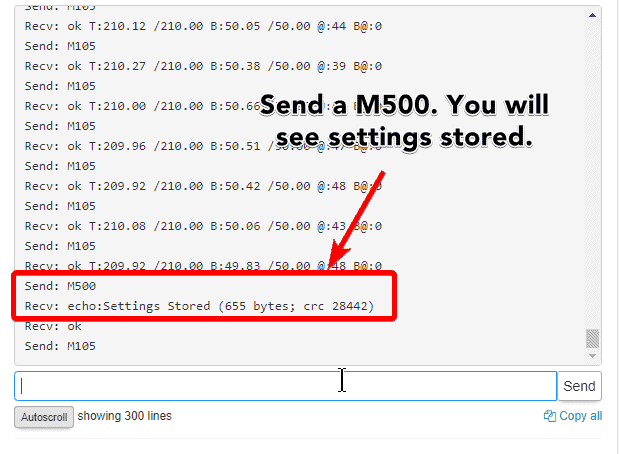
- Send M500
After doing these steps the mesh is now stored in the printer EEPROM.
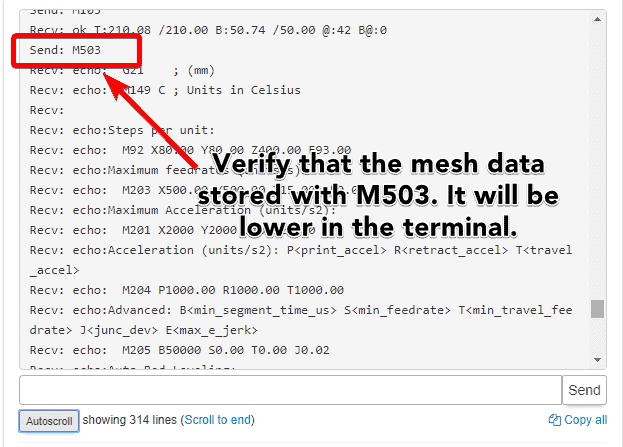
NOTE: This mesh will be wiped out should you clear the EEPROM (M502) and/or if you update the firmware. You will need to run the steps above to generate a new mesh if you clear the EEPROM and/or update the firmware.
Update your slicer to use the stored mesh #
- Load your slicer and open up the settings where the starting code is stored
- Replace the G29 with M420 S1
- If you want to use ABL fading use M420 S1 Z10 – This will fade ABL compensation until it is off over the first 10mm of the print.
- Slice up some files!
Pictures of Generating, Storing and Verifying the Mesh Data #